 Find and open PowerPoint.
Choose New from the File menu.
Find and open PowerPoint.
Choose New from the File menu.
 Click on Blank Presentation, then click the OK button.
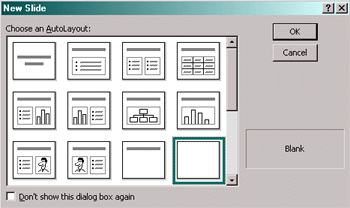 Scroll down until you see a blank slide in the lower right corner as in the picture above. Click on it and then click the OK button.
 Choose Toolbars... from the View menu at the top of the screen.
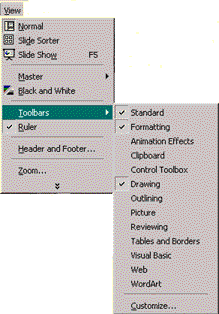 If there is not a
 already in the box next to Drawing tools, then click in the box. A should appear. If there are any other , click on the to get rid of it.

| Next: The Drawing Tools
|