Creating text in a Drawing
Since we are only dealing with text now we can change the toolbars that are to be viewed.
 Choose Toolbars... from the View menu and click on Formatting and Drawing only. Click on OK.
 Move your column as far to the left as possible. To do this :
- Choose Select All from the Edit menu.
- Choose Group from the Draw menu.
- While selected, drag the column to the left.
Now that your column is to the left we will add the caption.
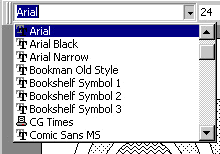
 Click on the Text tool button. Choose Arial from the Font pull-down menu.
Observe:

The Font pull-down menu lets you choose from a wide range of typefaces.
 Choose 18 from the Font Size pull-down menu.
Observe:

The Font Size pull-down menu lets you choose from a variety of type sizes.
 Create a caption box to the right of your column. Type Ionic in the caption box and then click outside the caption box.
 Create another caption box underneath the Ionic text. Type Order in the caption box and then click outside the caption box.
Position your text as in the example.
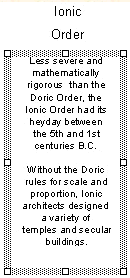
Your text should look similar to the following:

In addition to the Font Size and Font pull-down menus, PowerPoint's drawing tool offers these tool buttons:
 Increase Font Size and Decrease Font Size buttons.
These buttons allow you to increase or decrease the font size of selected text.
 ,
, Bold, Italic, Underline andText Shadow buttons.
These buttons allow you to make selected text bold, italicized, underlined, or shadowed.
 Font Color button.
This button allows you to change the color of selected text. Clicking on the button with the letter changes the text to the default color. If you want to change the font color then you must click on the arrow to the right. A pop up menu will appear with colors to chose from.
To finish the caption, we need to type in the description of the column underneath the heading.
 Click on the Text Tool and choose Arial font and choose 12 point font size.
 Create a caption box underneath the Ionic Order and type in the text shown on the example you have. Click outside the caption box.
 If the font size seems a little small, select the text and click on the Increase Font Size button to adjust it. Recall that text is selected when it is surrounded by the selection box, not the caption box.
Observe that this text is selected and the font has been increased:

 In addition, you can center the text within the caption box. While the text is selected click on the Center Alignment tool button (
![]() ) located in the Formatting toolbar.
) located in the Formatting toolbar.
Lastly you need to label the different parts of the column.
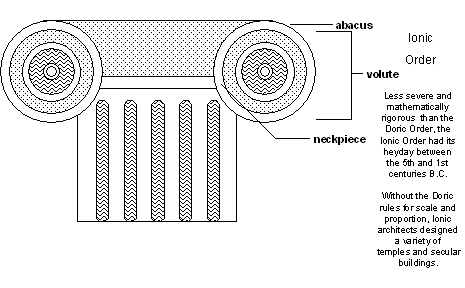
 Type in the text abacus, volute, and neckpiece as shown in the example.
 Click on the Line Tool and draw in the lines you see on the example.
Note that if you need to move the text around click on it and drag to the desired destination.
Your completed drawing should look similar to the following:

 Choose Toolbars... from the View menu and click on Formatting and Drawing only. Click on OK.
 Move your column as far to the left as possible. To do this :
 Click on the Text tool button. Choose Arial from the Font pull-down menu.

 Choose 18 from the Font Size pull-down menu.

 Create a caption box to the right of your column. Type Ionic in the caption box and then click outside the caption box.
 Create another caption box underneath the Ionic text. Type Order in the caption box and then click outside the caption box.

 Increase Font Size and Decrease Font Size buttons.
 ,
, Bold, Italic, Underline andText Shadow buttons.
 Font Color button.
 Click on the Text Tool and choose Arial font and choose 12 point font size.
 Create a caption box underneath the Ionic Order and type in the text shown on the example you have. Click outside the caption box.
 If the font size seems a little small, select the text and click on the Increase Font Size button to adjust it. Recall that text is selected when it is surrounded by the selection box, not the caption box.

 In addition, you can center the text within the caption box. While the text is selected click on the Center Alignment tool button (
 Type in the text abacus, volute, and neckpiece as shown in the example.
 Click on the Line Tool and draw in the lines you see on the example.
